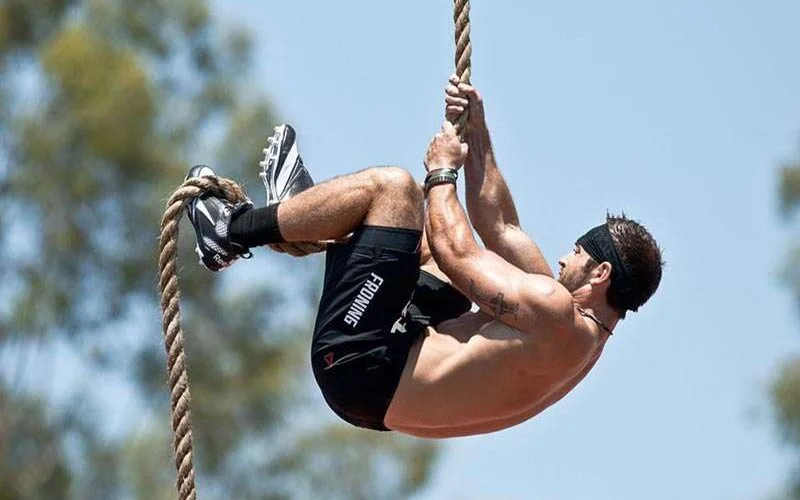
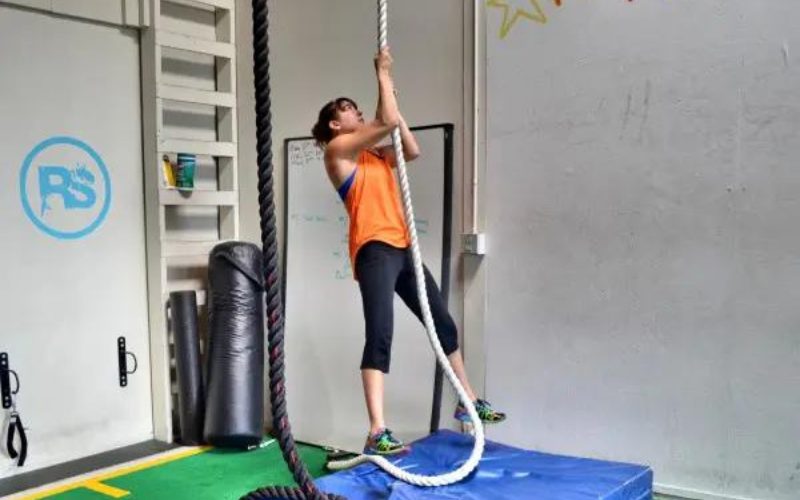
Rope climbing is a workout like no other because, as simple as it looks, it exercises almost every part of you. It tests your strength, enhances your coordination and makes you more agile. Rope climbing is an essential exercise for physical development.
Now you must not go to the gym or anywhere else to climb ropes when you can do it at home. You only need to build a rope climb following simple DIY procedures.
The beauty about this is that with your backyard rope climb. You can do many exercises with it, like Pull-ups and chin-up variations.
Some Benefits Of Rope Climbing

Rope climbing is a compound exercise that works on the muscles in different body parts, including the back, arms, shoulder and abs, so you must be in good shape before attempting rope climb. You need to have some hilfe Masterarbeit schreiben lassen amount of strength before you can embark on a rope climb.
That said, some benefits come from rope climbing, some of them include:
1. It brings about intramuscular coordination: through climbing ropes, a large number of muscle groups are affected by a rope climb as they communicate with each other, which is why the exercise is effective.
2. It gives a firmer grip: as your strength increases with a rope climb, so does your grip. The strength your firearm gains from rope and climbs helps impact a firmer grip.
3. It strengthens the core muscles: with a rope climb, a d keep your body in front of the leg as you climb, your core strength is increased, and it benefits your body generally.
4. It impacts Mental strength: it takes and stimulates mental strength to climb ropes. Hence you can develop and sustain an excellent mental attitude as you keep fit with the climbing rope.
5. It gives you muscular endurance: as much you adequately exercise on the climbing rope, it will help your muscle develop endurance because it is a great conditioning exercise. It also gives you the ability to master your weight, which is why most martial artists and wrestlers always go for rope climbing
6. It can boost your stamina: you can build up your stamina by establishing a timing circuit where you climb up, do your workouts and then climb down many times within a given period.
How To Build A Rope Climb At Home
If you can’t go to the gym to climb ropes, then you should build one at home, and the good news is that you can do it yourself ( if you wish).
The Materials You Will Need
- Two fence posts
- Two wall brackets for steel bars
- 1 Galvanized 1.5m steel bar
- Screws
- 2 PostSaver sleeves(optional)
- Snap hook for rope(optional)
- 4 PostFix or Postcrete bags
- Battens
- Crossfit climb rope
- External Varnish
- Paintbrush/Rags
The Tools You Will Need
- Post shovel
- Pocket tape measure
- Pencil/Sharpie
- Screwdriver
- Spirit level
- Aluminum straight edge
- Black pegs
- Blowtorch
- Wheelbarrow
- Step Ladder
The Measurements:
- 15 feet high 4×4 inches fence posts
- 34mm diameter, 1.5 m length Galvanized steel bar
- 1.5m apart distance between the two posts
- 25cm diameter hole, 2 feet deep for the fence posts to go in.
The Procedure:
1: Mark The Posts
With your aluminum edge, you should mark the position where you want the climbing rig. It should be straight, and a metre away from the support you will be using:
- A fence, wall or whatever else will serve as a Support.
- With your measuring tape or a pocket tape measure, mark the places where you will be putting the posts.
- As you do that, use two pegs about 4 inches apart to keep the width of the first post.
- Place your second pair of pegs 1.5 meters away from that first mark.
2. Now, Dig The Holes
Now that you marked where you want the posts, the next thing to do is to dig at least a 2 feet deep hole in front of the peg. The diameter of the hole should be 25cm or thereabout. Dig the second hole before the second peg, just like the first one.
3. Mark the posts
Use a pencil or a sharpie to mark how deep your fence posts will go underground. 2 to 3 feet from the end of the post is okay, but the height of your post determines how deep the post should go underground.
For a very tall post, more of its height will go underground. When you mark the foundation’s place, go about 60 cm above and mark it again. Also, the position where you want your post-saver sleeves to go. Ensure it is below ground level, so the Bott doesn’t get wet from the concrete.
Now you can start measuring from the other end and then mark half a foot below the end where the bar will go. You can change the height to whatever height you want, but it should be at most 15 feet.
4. Stick The Post-Saver Sleeves (optional)
To keep the ends of the post from getting wet from the concrete mix, slide the Post-Saver sleeves up to the mark you placed earlier and then use a blow torch to melt it into place.
5. Time To Put The Fence Posts Up
Now stick the fences into the holes, and as you do so, use Use a spirit level to see if they are straight up and even. Use the battens at a 45-degree angle to hold the fence posts up straight and provide support so that the fence posts don’t fall off. Using your support wall fence or tree for multiple battens would be best.
6. Pour in the PostFix Concrete
At this point, you should pour the PostFix concrete into the holes till they are just about filled up or an inch low the ground level. For the concrete to set, pour some water on it and leave it for at least 2 hours or more.
7. Now Attach The Bars To Place
Attach the bar into place with the wall bracket, but if it is a bit too long, you can cut it to a perfect size. You will screw your brackets along with the galvanized steel bar you put up on the fences at the park. Your bracket should fit with the steel and should be screwed in place securely. You can use the spirit level to ensure everything is straight and level.
8. Paint the fence posts ( optional)
You can paint the wood to protect it from rot and the elements. You can use a paintbrush to paint the fence post or a waterproof spray coat
9. Set up the rope
To set up the rope, you should tie it into place using a secure knot so that it can take your weight. You can also use a strong snap hook meant for rope climbing.
You can go ahead to enjoy your backyard rope climbing.
Frequently Asked Questions About Role Climbing
How Tall Should a Rope Climb Be?
Fifteen feet is the standard height for a rope climb, but you can change the size according to your needs and strength level. If you are building the rope climb indoors, you might opt for a shorter height. You can include 2-3 different ropes on your rope climb so that you can use different intensity levels.
What Size Rope is Used for rope climbing?
Most climb ropes are either 1.5 inches, 2 inches, or 2.5 inches, and different people have preferences. A 1.5-inch rope is ideal for most people because its thickness is just right. Too thick a rope can get you quickly exhausted, but this rope will give you a firm hold, making climbing a lot easier. There is the skinny 10mm rope only advanced climbers use, though.
What kind of rope is best for rope climbing?
The best rope for a rope climb is one that s made of manilla hemp, which is very sturdy and weather-resistant. You can find different options in the market, like the Yes4All Gym Climbing Rope and the Power Guidance Climbing Rope.
Are rope climbs better than pull-ups?
Yes, rope climbing is much better than pull-ups because rope climbing targets the brachialis muscles in a way that pull-ups do not. Secondly, your hands are positioned so that your biceps can ply more force than they can in pull-ups. It makes climbing rope a better workout than pull-ups.
Conclusion
Rope climbing is not a run-of-the-mill workout; it is a daunting and exhausting exercise that is not meant for the faint heart but is very beneficial and rewarding.
Helpful Links:
- Can Basketball End in a Tie?
- How Do You Store Outdoor Toys in The winter?
- How Much Weight Can a Basketball Hoop Hold
- Does Walmart Sell Badminton Sets
- Does Walmart Sell Croquet Sets
- How to Throw a Slider
It is excellent for impacting an individual’s physical and mental strength and stamina while helping to develop your grip and intramuscular coordination.
You can build your rope climb using elementary materials to partake in this workout whenever you want.
Follow us on Facebook, Instagram, and Pinterest for more updates