Tetherball is a fun game to play for both kids and adults. Growing up, I found the Tetherball game so engaging that it became one of my favourite games simply because I often play it with my older siblings, and sometimes, I play it alone when I am bored, and there is no one else to play with.
As a teenager, I always enjoyed going to campgrounds and playgrounds with a tetherball set to play with other kids to show my expertise in the game.
If you’re interested in tetherball games, going elsewhere to play it isn’t very meaningful when you can have it installed right in your backyard. So, in this article, I will teach you How to Set Up your Backyard Tetherball court with Tetherball court dimensions to follow. But before we go thoroughly into that, let’s know more about Tetherball court games.
What is Tetherball Game
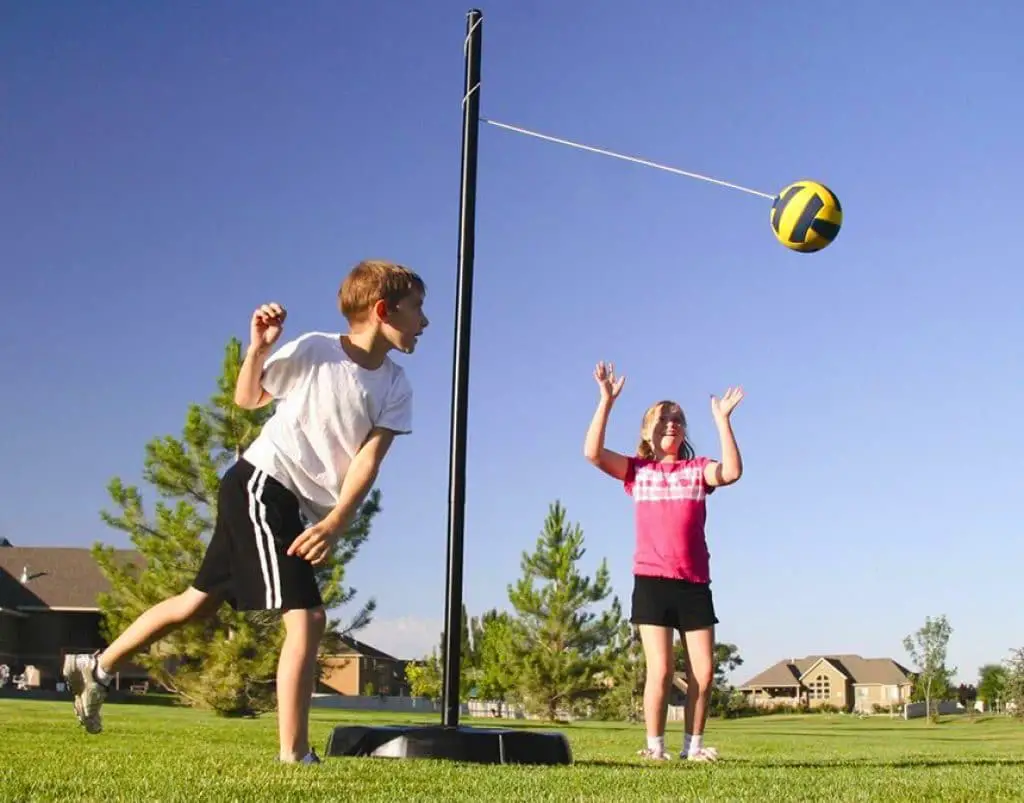
Tetherball game is often regarded as a backyard game involving two kids or adults standing against each other in the opposite direction to a swing ball attached to a pole with a string and thereby hitting the ball in the opposite direction to wrap the string over the middle pole.
If you’re playing with someone, both of you will be hitting the ball in the opposite direction in the form of a contest — basically, you hit it one way, and the person you’re playing with hits it the other way.
The goal is to hit the ball so that it’s difficult for your rival to get at the ball and hit it back. One technique is to hit the ball descending, so it goes high (and ideally unattainable) when it folds over to your rival’s side. You win when you wrap the string around toward you, and the ball hits the pole.
However, you can play this game alone, but it’s better to play it with someone. Tetherball is the backyard game for growing up kids because it keeps them playfully engaged at home. I believe one of the most incredible things you can do for your kids is by setting up a Tetherball playground right in the backyard of your home.
People who spend lots of time at home would love to have one Tetherball game set up in their backyard. It’s much more interesting if you’re trying it for the first time. You don’t have to go anywhere to enjoy this game because you can play it in the comfort of your backyard with your kids. Tetherball perhaps is one of the best backyard games to play!
When Tetherball was invented during the 19th century, it was familiar with volleyball; however, Tetherball is believed to have been discovered after volleyball was created in 1895. Tetherball is likewise likened to the game called paddleball played in Australia, UK, and New Zealand.
Materials Needed to Make a Homemade Backyard Tetherball Set
To build your own Tetherball set, you will need many supplies and materials. You may get some of the supplies for free, such as a tire; above all, it is more economical to build your Tetherball. These are the supplies you will need to build a homemade Tetherball:
- 1 tire
- 1 5/7 x 8 ft. 16 gauge galvanized steel line pole
- (2) 1 foot pieces of rebar
- Cement approximately (180 pounds)
- 5/8 x 3 in. round swivel eye bolt snap
- 1/4 x 2 5/8 in. eye bolt
- 2 washers, lock washer, and nut (all 1/4 inch)
- 18 gauge galvanized wire
- Tetherball with rope
- Drill
- Shovel
- Bucket
- Water
Having made all the materials mentioned above ready, we can begin the process of building your own homemade Backyard Tetherball Set. There are several ways to build your tetherball set, but the one I will be discussing in this article is the type you can build with a tire.
Building your Tetherball with a tire is much more beneficial because of portability; you can adjust it anytime you like or move it to another location in your backyard.
Let’s start to get started the right way!
How to Build a Homemade Backyard Tetherball Set
The first step to building a tetherball set is getting all the required materials mentioned above. Like I said earlier, some of these materials can be gotten for free, while some can be purchased from one of the tool shops in your neighbourhood.
After gathering all the necessary material, you start by designing the kind of Tetherball court you love to install in your backyard by marking out the portion you want to install your Tetherball set. We have more descriptions about how to Build a Tetherball Court below.
After marking your tetherball court, the next is to paint the tire you intend to use to make it more fascinating and beautiful; then, you prepare the tetherball pole for the final attachment of the Tetherball to the pole; this is done by clipping the snap bolt onto the eyebolt at the pole’s top and tying the rope onto the swivel part of the snap bolt. After this set up you can enjoy your new homemade Tetherball set.
How to Build a Tetherball Court
A Tetherball court is a place where the Tetherball is set in. Tetherball court can be made for both outdoors or indoors. During winter, it is awesome to build the Tetherball court in the garage.
To build your court, follow the steps below; when you are done building your Tetherball court, the next stage is to build your own tetherball set; the steps are described below.
Choose the Location
Decide where you would like to build the tetherball court. Make sure it is a level area. A flat driveway or grassy yard can make an excellent tetherball court.
Draw a Circle to Mark the Court.
Draw a circle, approximately 10 feet in diameter, to mark your court; if the court is on grass, use spray paint to mark the circle. If it will be on the pavement, the use of chalk is fantastic.
Place the Tetherball Set into the Center of the Circle
The next step is to place the Tetherball set into the centre of the circle. You may need to measure it to make sure you have it centred.
Mark a line in the Center of the Circle
Draw a line through the centre of the circle to allow each player to know where to stand; this will help make the homemade Tetherball court set up a big win.
How to Build a Tetherball Set
Step 1: Paint Tire

Look for a used tire that is still in good shape. If the tire is dirty with oil or any other stains, wash it thoroughly with detergent and dry it before using it. Give the tire an adorable and unique appearance or design by painting it with any colour of spray paint you like.
You can use a single paint colour or combination of colours to get your desired appearance. If you like, you can paint the metal cap that will go at the top of the pole to give it a matching colour with the tire.
Step 2: Bore Holes in the Pole
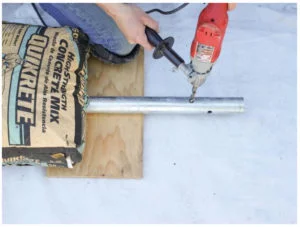
Start by drilling holes into one of the ends of the pole, do this in a cross pattern. As much as the poles’ ends are the same, it does not matter which side you will have to choose to drill. Firstly the hole ought to be drilled two inches from the bottom of the pole, the other hole five inches above that.
Next, you will need to slide in the rebar and make it firm with the electroplated wire. At the opposite end of the pole, drill a hole for the eye bolt and fasten it with a washer of about ¼ inch nut.
Step 3: Mixing of the Cement
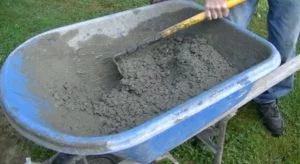
Set up the tire on a large trash bag. Making use of the trash bag will prevent the cement from leaking out of your yard. Use a shovel and bucket to mix the cement. Follow the directions that are on the sack of the cement.
Step 4: Pour the Cement into the Tire

Immediately you have mixed the cement, start pouring it into your tire. On the next step, set a large ladder next to the tire. This is to help support the pole while the cement is drying. Make sure you stick the pole into the tire as the rebar end goes in first. Centre the pole in the middle of the tire, and cover the rebar completely.
Keep checking to make sure the pole is in the centre. Tie the pole to the ladder with a wire. Either way, make sure you stay nearby to keep checking on the cement and to make sure the pole is still level and rightly placed.
Step 5: Inscribing the Names of your kids on the cement
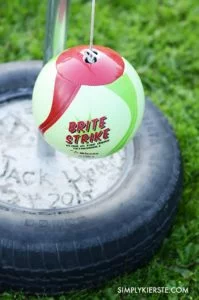
Write Your Kids’ Names in the Cement; After the cement has dried for three or four hours, you can write your children’s names in the cement. They may want to write their name into the cement, depending on their age.
Another option is to have them press their hand into the cement to make a handprint. This option is much easier than writing a name. Make sure you have allowed the cement to dry for a few hours before doing this step. You will want the cement to be semi-firm.
Step 6: Attach the Tetherball

Attach the Tetherball to the Pole; The last step to building a tetherball set is attaching the Tetherball to the tetherball pole. To do this, clip the snap bolt onto the eyebolt at the top of the pole, and tie the rope onto the swivel portion of the snap bolt. Now you can enjoy your new tetherball set! Later in this article, I will share some fun games to play with your new Tetherball.
Different Tetherball Games to Play
The official way to play Tetherball is for two people to hit the ball back and forth while making it wrap around the pole. However, there are some other fun ways to play Tetherball. Remember to use your imagination, and feel free to make any new rules that you would like to adjust to the age of the players. Here are some ideas to get you started:
Carve Out a Category Each Time You Hit the Ball: Each time a player hits the ball, they must yell out a category. Categories could include colour, girl names, boy names, fruit, countries, etc. Each time the player has to say a different name. For example, they can’t say the same colour twice.
If the player misses calling out the name or says a name that has already been said, the other player gets a free hit. Once one of the players wraps the ball around the pole, you can start the game over.
Use Paddles: Instead of using your hands, use sturdy paddles to hit the ball back and forth.
Conclusion
Tetherball offers fantastic backyard fun, so you must consider installing it for your kids. Imagine all the fun you could have with your kids, parties and get-togethers if you have a Tetherball set up in your backyard. It’s a fun way of exercise for you and your family. The advantage of a tetherball set is that you can start playing the game immediately once it’s set up.
You can always spend like 15 minutes of your leisure time in your backyard with your kids or friends playing the homemade Tetherball. This help in easing and knocking off the stress and boring times of workload at the office, workshop or maybe you had a hard day.
Now that you have built your Tetherball in your backyard, you can easily walk into your backyard and play the Tetherball with your wife; you can even play alone with a friend that stopped by.
Finally, you now know it’s all fun to build a homemade Backyard Tetherball set, so always share your new Tetherball court with your neighbour’s kid next door.
Next Thing To Consider At Your Backyard:
- Small Backyard Wedding – How to Plan a Perfect Backyard Wedding
- Backyard Baby Shower Decoration Ideas
Hope this article is helpful, kindly use your social media account like Facebook and Twitter to share this information with those that might need it. Let’s know your thought in the comment section below!
Cheer!