The revolution “going green” did not start today. Mother nature started recycling our organic waste and turning them into useful nutrients for our plants long before we cottoned on.
Today we can compost right in the soil, use a tumbler or a bin, and all of them work just fine. However, there is this composting bin that I’d take the gardening world by storm, and that is ” the soil saver compost bin.
This innovative compost bin makes composting too easy while yielding nutrient-rich compost. Today we will tell you all you need to know about this product.
Why Composting
Two main factors are responsible for people opting for compost as a source of nutrients for their gardens and farm:
The world is going green.
The world is generating more waste than ever, which must be recycled.
Can you believe that in the US alone, research has shown that a whopping 87 million tons of municipal solid waste were recycled as far back as ten years ago, and the amount of materials that are still recycled these days is really on the increase?
This recycling saves more than 1.1 quadrillions Btu of energy. To better understand this figure, this same amount of energy is used by 10 million households in one year. This is the classical case of ‘our waste worth a fortune.
Now imagine that quantity of waste being dumped in landfills consistently year in, year out, and you will end up with a lot of solid waste polluting our environment.
Hence with composting, which is part of recycling organic waste, you are simply turning your waste into something very useful while at the same time saving the universe from massive pollution by solid waste.
Research has also shown that food waste is the single largest item thrown away, constituting about 21 percent of everything we throw out. Hence with composting, we are simply turning these food scraps into fertilization for our gardens rather than paying to have them sent to a landfill.
Why You Need Soil Saver Compost Bin
Some features make the soil saver compost bin the compost bin of choice, and here are some of them:
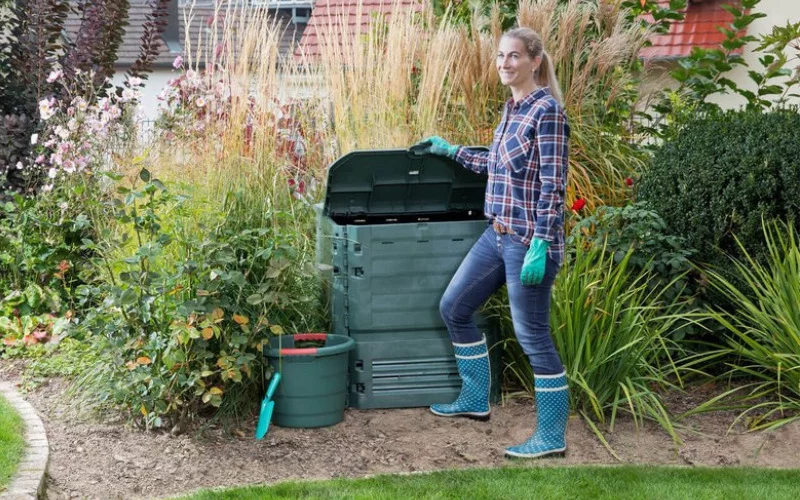
1. It Has A Large Capacity
Suppose you have a large family that generates waste like no man’s business. In that case, those small compost bins and tumblers that some people keep in their backyard will not just work because, for starters, those bins can easily get filled up in a matter of days.
Secondly, and most importantly, the pile size of your compost bin determines how fast the compost will yield.
This is one advantage the soil saver compost bin has. The size of this unit means you can pile a lot of compostable material, generating enough heat to keep the composting process going.
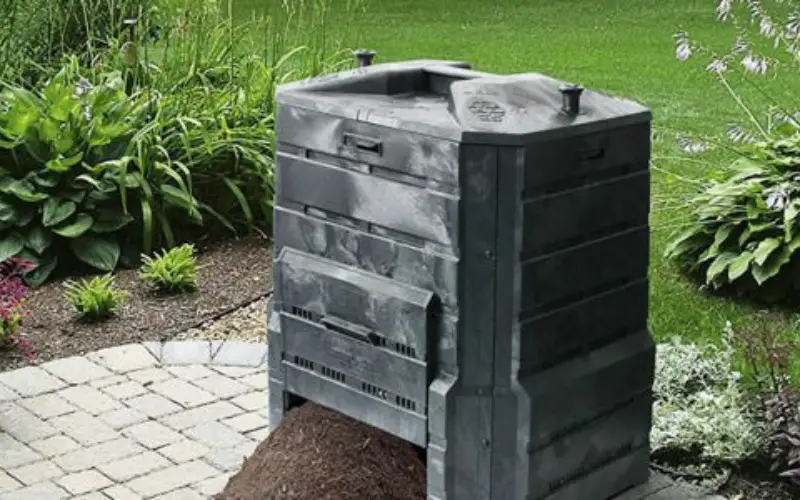
2. The Design
The design of the soil saver compost bin is such that it has a watchable top and dual doors, and the merit of the top watchable door is that it helps to keep animals away from the bin (even though we can’t say the same for children).
You will not have to worry about the wind blowing the door open during a windy day or the rain turning your composting material into a wet blob.
The two doors at the bottom of the bin help you get your compost out; all you need do is simply open them up and shovel out your finished product. Now, even though the shoveling of the compost is a chore, however, the two access doors make it a lot easier to do.
3. The Warranty
If there is nothing that tells you how much the manufacturers of this compost bin, let the warranty on the product do that. With 20 years warranty on the soil saver compost bin, you are assured of a sturdy and durable product that you can use for many years.
4. The Features
Other perks come from getting a unit of the Algreen, one of which is the fact there are air slots and holes throughout the bin to keep your compost from going anaerobic and/or getting too wet.
With this product, you get a booklet that teaches you how to make compost, an added plus that makes it fit for those just learning to make compost.
The open-bottom design of this compost bin allows worms to thrive in the bin and even escape into the ground when the condition becomes unfavourable to them.
5. It’s Made From Recycled Material
While this does not directly affect the compost made, the fact that the soil saver compost bin is made from recycled materials means the manufacturers of this product care about the environment, and so do we.
READ: Composting Pine Needles and Cones
How To Use Soil Saver Compost Bin
A compost bin is a multitasking unit that decomposes the organic matter, including kitchen and yard waste that is put into it, to yield rich compost that supplies nutrients for plants to grow.
To use the soil saver compost bin, you will have first to assemble it because the unit comes in compact form for ease of storage and transportation. This assembling which starts with the lids, the lock and the sides, can be done easily by following the manufacturer’s manual that comes with the unit.
With your unit properly assembled, the next thing to do is to place it in an ideal location. You want to place the bin in a flat sunny spot. This will keep the bin from twisting as it is filled so that it can be properly closed.
To get the best from your compost bin, you will have to maintain a delicate balance between the organic wastes, water, and air, and there are four essential things to keep in mind as you make compost:
1. Have a build-up of carbon-rich compostable materials (also known as brown compost materials), for example, dried leaves.
2. Have an ample supply of nitrogen-rich compostable materials (also known as green materials). Examples include fruit peels.
3. Ensure that the compost materials are damp but not wet
4. Aerate the compost pile by turning them regularly.
Once you do these, you will create a good environment for decomposing organic waste materials into compost in the compost bin.
Steps To Composting Using A Compost Bin
Five basic steps to follow in yielding nutrient-rich compost from a compost bin. They include:
1. Stockpile Your Compostable Materials
The first thing you want to do is to accumulate all the materials you will be composting. The good news is that about a third of all the waste we generate from our homes is compostable, from kitchen waste to newspapers, grass clippings and what have you.
Do pile up organic materials like Fruit and vegetable scraps, shredded scrap paper and non-glossy newspaper, yard waste like fresh grass clippings, fresh weeds without seeds, green grass, Teabags, coffee grounds, straw and sawdust.
You should accumulate these materials at least 3 feet high because the more the pile, the faster your compost gets ready. The ratio of carbon to nitrogen-rich material has been debated for a while amongst gardeners, but your best bet is to pile one bucket of green stuff into two buckets of brown matter.
2. Layer The Compostable Materials Into Your Compost Bin
Once you have a reasonable Pike of both the green and brown compostable materials, you can add them to the soil saver compost bin. You, however, don’t just heap all the materials haphazardly.
You start by adding a layer of brown compost material to about 2 inches high, then add a little sprinkling of water to the layer, so it doesn’t dry out.
Then you add a layer of the nitrogen-rich compostable materials to the bin to about 2 inches tall, and you so water the layer lightly.
You keep alternating between the brown and the green materials until your soil saver compost bin is full. You, however, must ensure that the last layer of material you add is the browns, as this will ensure that you don’t end up with a stinky and fly-infested bin.
To ensure you don’t prevent flies from infesting your soil saver compost bin, you can finish off everything with a layer of soil.
3. Ensure The Pile Is Damp But Not Watery
You want to get the moisture level of your pile right. To check if the moisture content of your compost pile is okay, grab a handful from your compost pile and squeeze. You will feel the compost like a wrung-out sponge: it will be damp but not soggy.
If it is doggy, it means you have too much moisture in the pike, and browns like twigs will need to be added. If it is dry, you might sprinkle a little water or add more green compostable materials like fruit and vegetable scraps to the pile.
4. Make Sure That The Pile Is Aerated
Regularly turning the compost pile will keep it Aerated; this is especially important because the microbes in the pile which convert these materials into compost require oxygen for respiration.
To turn the pike, stick a garden fork or spade into the pile and turn it regularly. At first, it should be every couple of days, but you can turn it in once weekly after two weeks.
5. Check To See If Your Compost Is Ready To Use
Some signs tell you that your compost is ready. If the pile is turning dark and rich, with a smooth and crumbly texture, and smells woody and earthy, then your compost is ready.
You can use your shovel to dig out those nutrient-rich compost from the two access doors at the back of the bin. It will take 2 to 3 months for your compost to be ready for all things to be equal.
With a conventional compost bin which is usually smaller in size than the soil saver compost bin, it could take up to 3 to 6 months for your compost to be ready.
Tips To Making Your Compost Yield Faster
There are some things you can do to make your compost ready in a shorter period, it includes:
1. Placing your compost bin in a sunny place where the pile can easily heat up will make the compost ready in a shorter time; this is because, at a relatively higher temperature, the microbes which are the ‘real workers’ on your compost bin are dry a time and so can quickly convert the Compost materials to compost.
2. The more the surface area of the materials to be composted, the Faster the microorganisms in the compost pile will convert them to compost. To increase the surface area of your compostable materials, using a compost turner or a shredder to break the materials into smaller pieces will make the Composting process faster.
3. The moisture content of the compost pile can affect how fast your compost yield. Too little water will dry out the compost materials, and we know that the microbes in a pile love things and require water to function. If the moisture level is not optimum, it will slow their decomposition rate. On the other hand, too much moisture in a pile will take up the air pores, thereby keeping the microbes from getting the much-needed oxygen they need to stay alive and work on the compost.
4. The higher the volume of compostable material, the faster the composting process. This is because a large volume of compost will be able to insulate itself and hold on to the heat generated by the microbial activities in a pile, a d this heat is required for the composting process to occur.
5. You can speed up the composting process of a compost pile by activating the pile. You can do this by adding some manure or some compost from your last badge. The microbes in the manure or the compost will help start the decomposition process, making the compost yield on time.
Conclusion
Composting is one of the trendy things happening in the gardening world. It does not come as a surprise because people are beginning to realize that they can recycle their waste into fertilizers for their plants.
The soil saver compost bin is ideal for composting tour kitchen and garden waste because it can efficiently yield compost in no time.
Helpful Links:
- Can You Compost Pineapple?
- How Do You Grind Compost?
- How To Compost Corn Plants
- Can Paper Towels Be Composted?
- Can I Compost Any Material I Find?
- Best Composting Grinder for Home Use
We trust this article helped you know a good source of carbon for compost. You may also want to check out How to Make Homemade Compost Catalyst.
Thanks for taking the time to read our article, and we hope you find it helpful. Would you mind leaving a comment below if you have any suggestions?
Kindly reach out to people by sharing this post on social media.
If you liked this article, then please follow us on Facebook, Instagram, and Pinterest.